
KNPL Variance Project Documentation
User Management
Steps to Access
- Login to the application using your Admin Username and Password.
- From the Main Menu, navigate to User Management.
- You will be redirected to the User Management page listing all users.
Note: This page is accessible only to admins. Regular users do not have access.
Standard Operating Procedure (SOP)
- View Users: Browse the user list, use search or filter options, and click on a user to see details.
- Edit User: Click the Edit button next to a user, update details such as name, email, or role, and click Save.
- Delete User: Click the Delete button next to a user, confirm the action in the popup.
- Promote to Admin: Click Promote to Admin for a regular user.
- Demote Admin: Click Demote to User for an existing admin.
1. User List and Details
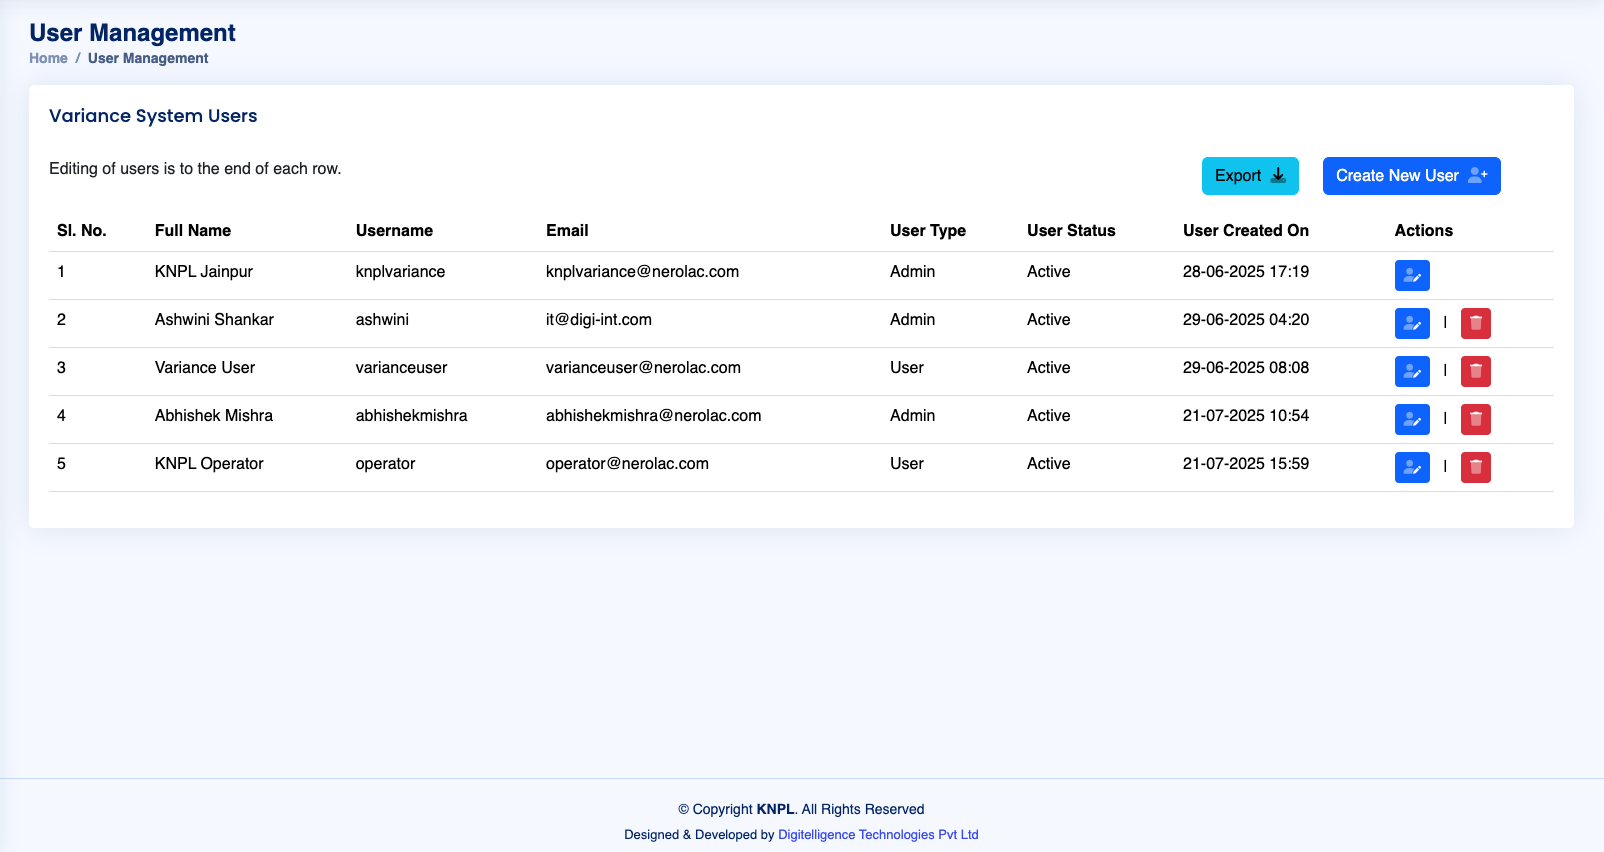
Figure: Tabular User List with Roles and Actions
The User Management table displays all users with the following fields:
- Sl No – Serial number of the user.
- Username – Unique login name.
- Email – User’s registered email.
- Role – Either User or Admin.
- Status – Active or Inactive.
- Actions – Buttons for Edit, Delete, Promote to Admin, or Demote to User.
2. Operations and Options
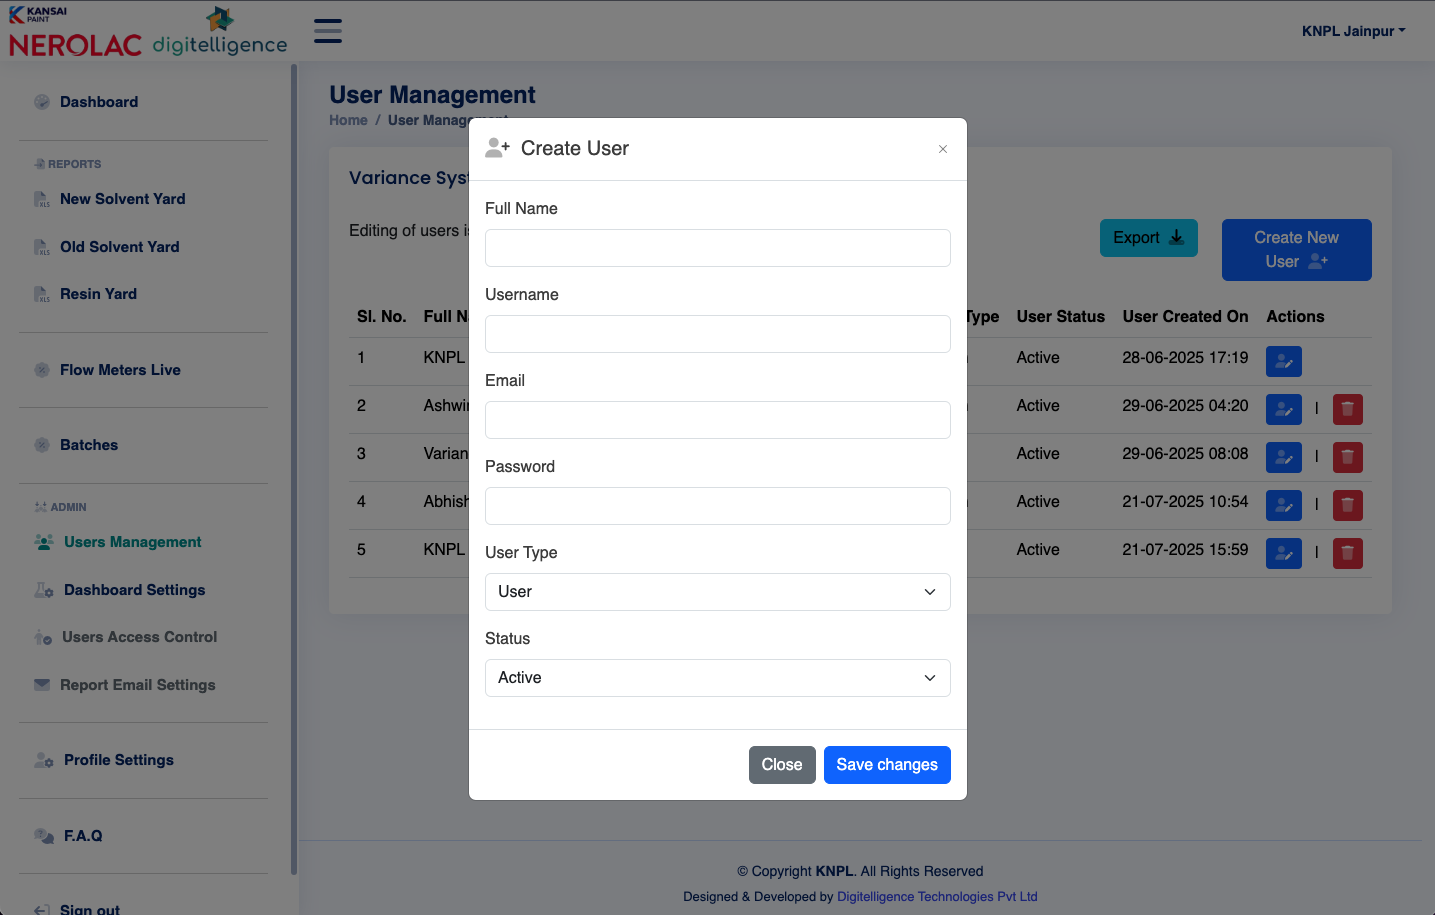
Figure: Action Buttons for CRUD Operations
Each operation has the following options:
- Create User: Enter username, email, password, and role; click Save.
- Read/View User: Click on a user row to see detailed information.
- Update/Edit User: Modify name, email, or role; click Save.
- Delete User: Confirm deletion via popup.
- Promote to Admin: Change a regular user’s role to Admin.
- Demote Admin: Change an Admin’s role back to User.
All changes are logged for audit purposes.